 Most ‘electronic’ rain gauges used these days for rain monitoring for the IoT world, use a ‘tipping’ bucket see-saw mechanism. If you are using one of these with the original display, then that’s fine, nothing to do.
If on the other hand, like me, your weather station electronics have died, then you maybe reconsidering ‘up cycling’ the actual rain sensor for your latest IoT project. In this case, you will need to ‘calibrate’ your tipping bucket sensor so you know how much rain has passed through it.
There are several articles on the Internet for doing this, so why write another? Well most are written and miss off some of the important stages and processes, making it difficult to achieve. So I have tried to be a little more helpful and complete….
First of all, you need to connect your rain sensor to your IoT hardware in order to count the ‘tips’ of the see-saw. I’m not going to discuss the in’s and out’s of doing this hardware connection. This is quite simple.
Generally, there is a small reed switch which closes momentarily as the see-saw tips over. If you connect one side of this reed switch to ground, and the other side to a suitable I/O pin on your IoT device, along with a pull up resistor (anywhere between 1KΩ and 100KΩ). This can be either a software enabled pull-up for the I/O pin, or a physical resistor. It makes little difference, but not both.
Your software needs to ideally capture the low pulse as the see-saw tips over, easy with an interrupt generation and then increment a ‘total count’. Or do it the hard hard way and monitor the state of the pin and ‘watch’ for the low pulse.
Once this done and you are counting the pulses/tips, you can now calibrate your sensor, so you know how much rain the gauge has seen, counting every time the see-saw tips over. Because there is a bucket at each end of the see-saw, this type of sensor does not provide continuous rain measurement. But only when the bucket is full, then a tip occurs and you have measured a repeatable quantity of rain. For my Technoline gauge, this is approximately after every 0.755mm of rain fall.
But how much rain? This is why you need to calibrate the sensor, unless you are lucky enough to know. In which case, why are you reading this article if you already know??
Anyway. Your IoT device is now counting see-saw tips, but how much rain is it telling you about? For this, we need to make some measurements BEFORE you fully mount your rain gauge.
The first thing we need to know, it what is the catchment area of your rain sensor. It will probably be either rectangular/square or circular. In which case the maths is easy. If on the other hand it is a difficult shape, such as elliptical, then the measurement and the maths is going to be really difficult – enjoy that.
Carefully measure the main aperture opening. That’s the big opening at the top and not the little hole at the bottom of the funnel that fills the see-saw buckets. You can have the area of the aperture in metric or imperial. Which ever you choose, this will be units that the gauge measures in. Don’t mix units during this stage. Use either metric OR imperial.
Once you know the area of the rain aperture, we are ready to progress to the next stage and measure the bucket volumes.
Place your rain gauge on a level (X & Y) surface over a bath or basin. If it’s not quite level, wedge it firmly so that it is perfectly level on both axis. This is much easier to complete this stage, rather than outside or up on your roof. Much safer too.
Most of the instructions out there on the Internet get you to pour a small and accurate quantities of water through your gauge. Actually it is much easier, once your IoT project is counting the tips, to pour a much larger quantity of water through the gauge.
I used 500ml (or ~1 pint or ~16fl oz). A volume is needed which should make your see-saw tip at least 50 times AND is easy for you to measure out each time. Pour this water through your rain gauge carefully and slowly and record the number of tips. Slowly is very important. Repeat this at least 6 times, recording the total number of tips for your volume of water.
How you pour this water through your sensor, will define how accurate your results are:
- If you pour too fast – water will splash out of the bucket before it tips. Meaning it will report less tips for the volume of water. It is difficult to judge this, but if the funnel backs up, you are almost certainly pouring too fast.
- If you pour too slowly – Although very accurate results will be obtained, you will get bored. If your see-saw is tipping less than once ever 5 seconds, you can probably speed up a little.
- You must pour down the inside of the funnel. If you try to pour through the funnel hole directly, you will splash water out of the bucket and affect the readings, like pouring too fast.
Repeating this test 6 or more times, and this should cancel out any errors. If your see-saw counts differ by more than 2 or 3 each time, you are doing something wrong. Ignore your first attempt.
So for my old TechnoLine rain sensor, I got the following counts for 500ml of water:
- 95
- 95
- 93
- 93
- 96
- 91
This gives an average of 93.83 tips per 500ml. This then gives 500ml divided by 93.83 tips, which results in each tip being 5.33ml of water per tip.
OK. So now how much rain does this equate to?
My TechnoLine sensor is rectangular, with an opening of 126mm by 56m, which gives an aperture opening of 7056mm2. 1mm of rain hitting this aperture of 7056mm2 equates to 7.056ml of water. As we know, each tip is 5.33ml. So each tip is 5.33ml divided by 7.056ml which equates to a tip equals 0.755mm of rain.
Now we can multiply the number of counts in a period (say 24hrs) by 0.755 to get the mm of rain that fell in 24hrs. So if 34 tips were detected in 24hrs. Then 34 x 0.755 = 25.67mm of rain or just over 1inch.
Now you can complete the installation of your rain gauge in a suitable location, knowing it will be measuring accurately.
Note #1: If your rain gauge has a couple of little calibration screws in the base for each bucket. You will need to adjust these to obtain the same tip over volume for each bucket. For this, you will need a suitable syringe (no need for a needle). Number the buckets 1 & 2. Fill the syringe and carefully and slowly fill bucket #1 until it tips. Workout the volume of water needed to tip bucket #1. Repeat this for bucket #2. You will need to adjust the bucket screw (in to decrease the water volume needed to tip, out to increase the volume needed). Once they match, you can either use this ‘matched’ figure or use the averaging method discussed above. This is quite fiddly and requires lots of tries until both the buckets tip over with the same volume of water. Once ‘adjusted’ repeat the filling of each bucket at least 3 times to make sure they are similar and repeatable.
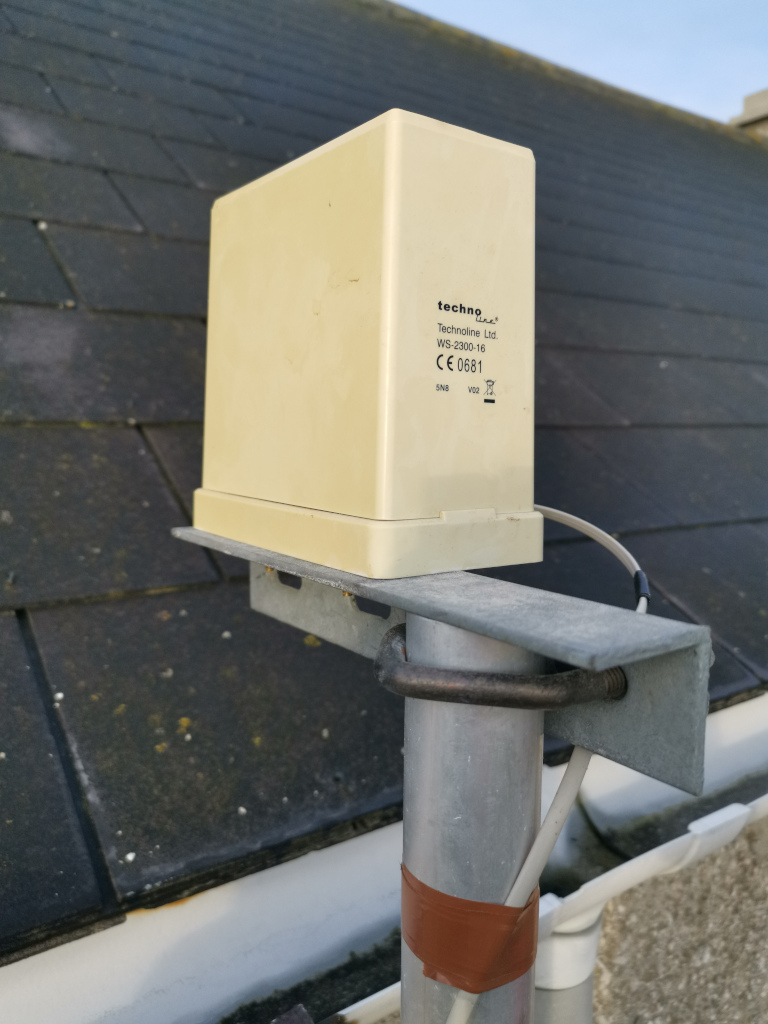
Note #2: When installing your rain gauge, make sure it is securely fixed – very securely. Any movement (by wind, or whatever) could cause the see-saw to tip over early or worse still, even tip if it is empty. If this occurs, this will cause tip counts to be accumulated and this will indicate more rain than has actually fallen. An early installation I had, I put the collector up a tall pole mounted on the chimney. And on a windy night, it managed to ‘count’ 999.99mm of rain. Which never happened, in fact there was no rain at all. The wind was moving the pole so much, the see-saw was flicking back and forth all night. Also make sure there is no obstructions to rain fall from any direction, as this would indicate lower rain counts. This is particularly important in windy areas, where (for example) a pitched roof could shelter the sensor. The image at the start of this post (my installed location) is prone to reduced rain detection when there is a very strong northerly wind. But it is a compromise between high enough to avoid this issue and low enough to reduce wind vibration and low/false tip counts. Don’t forget to make sure it is also level in both X and Y axis.
Note #3: Extremes: There are some environment conditions that will affect your rain measurements with this type of sensor.
#1 – Cold: Sub-zero temperatures prevent liquid precipitations and can so freeze up the unit. You could use a small heater to keep the sensor ice free (and the drainage ports/ducts) and allow it to continue to measure snow and hail in colder conditions. You need to be careful not to melt the plastic case. Also see #2 next. So most of the time in cold weather, the see-saw can’t measure any precipitations until the temperatures rise above 0°C again.
#2 – Heat: During times where it is hot, there maybe time where the counts would be low. This is due to evaporation from the bucket before there is enough to tip the contents. Take for example: You need 0.5mm of rain to tip the see-saw. So during the early morning, you get 0.3mm of rain, not enough to fill a bucket and cause a tip. Then it is hot and sunny. The water evaporates from the bucket. Then you get 1.8mm of rain early evening. Ideally 0.3mm plus 1.8mm would be 2.1mm of rain. Resulting in 4 tips. But actually the initial 0.3mm evaporated off before the later rain came along to tip out. So you actually only measured 1.8mm of rain, with only 3 tips. So for the day, your system only ‘saw’ 1.5mm of rain, not 2mm as would have been expected. During warmer/hot weather, rain measurements maybe lost due to evaporation of incomplete tips. A suitable Stevenson Screen may help in this situation, but be careful not affect capture of precipitation. Any direct sunlight or warm air can cause evaporations.
#3 – Wind/Vibration: As already discussed, strong wind can cause vibration which can tip the see-saw early or when only partly full. Mounting vibrations can also cause similar issues. Say you have it mounted on a fence post near to a road the carries large lorries. This may also create the incorrect tipping pattern. Early/empty tips will indicate more rain than has actually fallen. It is not always obvious that this is occurring and is difficult to resolve.